How to Take an MRSA Swab at Home: A Step-by-Step Guide
What if a minor error in your swabbing technique was the only thing standing between you and your scheduled surgery date? It’s a common concern for many patients in the UK who are asked to self-screen before an operation. You likely feel the pressure of hospital deadlines and the worry that an incorrectly handled swab might lead to a false negative or a rejected sample. It’s perfectly normal to feel a bit overwhelmed by the clinical requirements of self-testing in a domestic setting.
We understand that you need clear, foolproof instructions to ensure your peace of mind. This guide explains exactly how to take mrsa swab at home using the same sterile principles used in a professional clinic. By mastering the correct sequence and pressure, you can ensure your results are accurate and delivered quickly to meet your pre-operative requirements.
In the following sections, we provide a step-by-step walkthrough of the collection process for the nose, axilla, and groin. You’ll learn how to maintain the integrity of the kit and how to prepare your samples for rapid laboratory analysis, helping you move forward with your healthcare journey with confidence.
Key Takeaways
- Understand how precise swabbing identifies MRSA colonisation to prevent surgical site infections and avoid costly procedure delays.
- Learn exactly how to take mrsa swab at home using a specific sequence that starts with the nose and moves to the groin to maintain sample integrity.
- Discover the importance of avoiding antiseptic washes or antibiotic creams for 48 hours before testing to ensure your results are medically valid.
- Master the administrative steps, such as documenting the exact collection time, to facilitate rapid results from accredited laboratories.
- Explore the benefits of confidential, at-home screening which provides clinical accuracy with the convenience and discretion of a non-clinical environment.
Why Correct MRSA Swabbing is Crucial for Your Health and Surgery
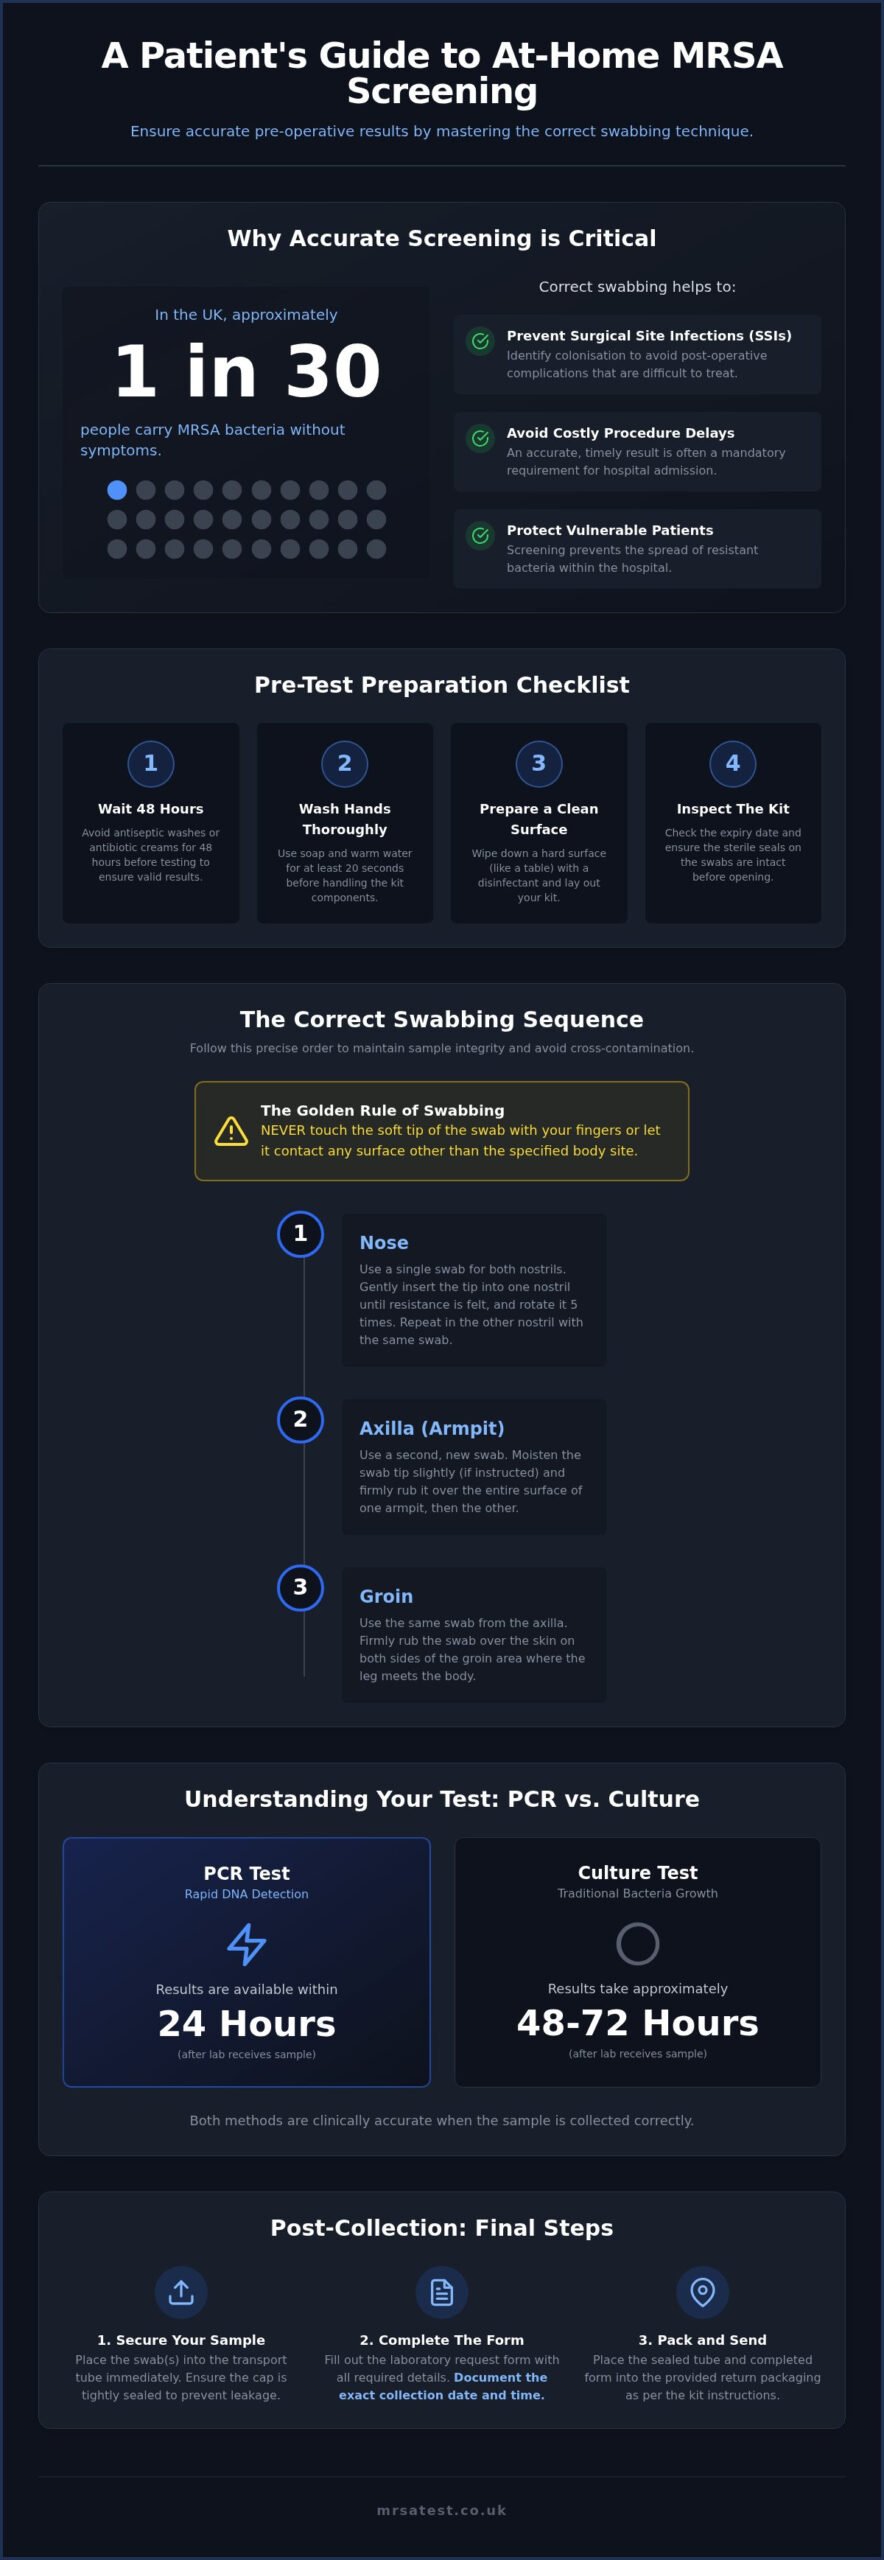
MRSA screening isn’t just a box-ticking exercise; it’s a vital safety measure for any patient entering a clinical environment. Many people are surprised to learn that approximately one in 30 people in the UK carry these bacteria on their skin or in their nose without feeling unwell. This state is known as ‘colonisation’. While harmless in daily life, these bacteria pose a severe risk if they enter the body through a surgical incision or a catheter site.
Accurate screening helps healthcare teams identify colonisation before you arrive at the hospital. If you don’t follow the instructions on how to take mrsa swab at home correctly, you risk a ‘false negative’. This means the test says you’re clear when you actually carry the bacteria. Post-surgery, this can lead to surgical site infections (SSIs) that are notoriously difficult to treat with standard antibiotics. These infections often result in prolonged hospital stays, increased pain, or the need for further operations.
Hospitals enforce strict hygiene protocols because MRSA can spread easily between patients. A clear, accurate result is often a mandatory requirement for admission for the following reasons:
- To identify patients who require a five-day decolonisation treatment before their procedure.
- To prevent the spread of resistant bacteria to other vulnerable patients on the ward.
- To ensure the surgical environment remains as sterile as possible.
The Role of MRSA in Hospital-Acquired Infections
Hospital-acquired infections remain a significant concern for patient safety across the UK. By identifying Methicillin-resistant Staphylococcus aureus (MRSA) before admission, medical teams can take proactive steps to mitigate risks. MRSA is a strain of staph bacteria that has developed resistance to many common antibiotics, making it a “serious threat” according to international health advisories. While the NHS provides screening, private testing offers a reliable backup if you face scheduling delays or need rapid results to secure a surgery slot.
PCR vs. Culture: How Your Test Choice Affects the Process
When choosing your kit, you’ll encounter two primary methods: PCR and Culture. Both require the same physical technique, but the laboratory analysis differs. MRSA Culture vs. PCR tests offer different timelines for your results. PCR (Polymerase Chain Reaction) is a rapid method that detects bacterial DNA, providing results within 24 hours of the lab receiving your sample. In contrast, a culture test involves growing the bacteria in a controlled environment, which typically takes 48 to 72 hours. Both methods are clinically accurate, provided you understand how to take mrsa swab at home with the correct pressure and sequence.
At-Home MRSA Test Prep: Sterility and Kit Components
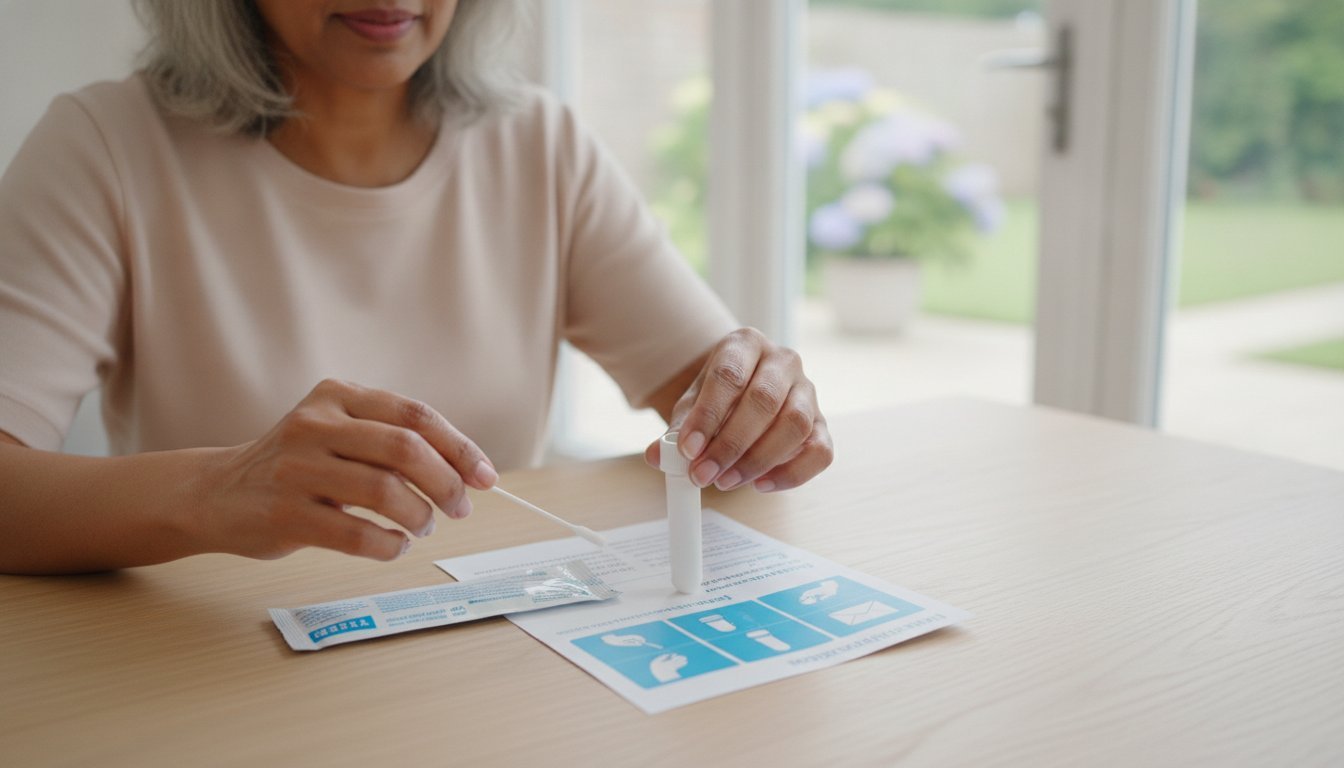
Before you begin the process of how to take mrsa swab at home, you must ensure your environment is prepared. A standard kit contains three essential items: sterile swabs, a tube containing transport medium, and a laboratory request form. It’s vital to check the expiry date on the packaging before opening. If the sterile seal on the swab is broken or the packaging appears damaged, don’t use it. Contamination from environmental bacteria can lead to inconclusive results, which might delay your procedure.
One of the most critical rules is to never touch the soft tip of the swab with your fingers or allow it to contact any surface other than the specific body site being tested. Even a brief touch can contaminate the sample with non-target bacteria. This quiet attention to detail is what ensures your result is clinically valid. If you feel unsure about any part of the kit, take a moment to read the provided instructions again before you break any seals. Ensuring you have a clean, well-lit environment for sample collection will make the process much more manageable.
Setting Up Your Sterile Field
Preparation is the foundation of a successful test. Start by washing your hands thoroughly with warm water and soap for at least 20 seconds. Clear a hard surface, such as a kitchen table or bathroom counter, and wipe it down with a household disinfectant. Lay out your components in the order you’ll use them. If you’re testing multiple sites, ensure you have a mirror positioned nearby. A mirror is particularly helpful for nasal swabbing, ensuring you reach the correct depth without discomfort. If you’re looking for clinical context on sampling protocols, you can refer to this step-by-step guide for MRSA self-collection which outlines the standards for sampling.
Understanding the Transport Medium
The small tube in your kit contains a substance known as Amies medium. Transport medium is a substance that keeps bacteria viable without allowing them to overgrow. Whether it’s a clear liquid or a charcoal-based gel, its purpose is to preserve any MRSA bacteria until they reach the accredited laboratory. Be extremely careful not to spill this liquid when opening the tube. If the medium is lost, the swab will dry out, and the lab won’t be able to provide an accurate reading. Taking these preparatory steps ensures that your sample is of the highest quality. For those who need to meet urgent pre-op deadlines, choosing a professional MRSA testing service can provide the speed and reliability required for peace of mind.
Step-by-Step Guide: How to Take an MRSA Swab from Each Body Site
To achieve a high-yield sample, you must follow a specific sequence. We recommend starting with the cleanest areas, such as the nose, and concluding with the groin. This order helps maintain the integrity of the sample, especially if your kit requires a single swab for multiple sites. When you’re learning how to take mrsa swab at home, the physical motion you use is critical. We advise using the ‘Roll and Rub’ technique. This involves applying firm but gentle pressure as you rotate the swab, ensuring you collect enough skin cells and surface bacteria for the laboratory to analyze. After sampling each required site, ensure the swab is properly seated in the transport tube. This prevents the tip from drying out before it reaches the lab.
The Nostrils (Anterior Nares)
The nose is a primary site for MRSA colonisation. Carefully insert the soft tip of the swab roughly 1-2cm into the first nostril. Rotate the swab five times against the inside wall of the nose using a steady, circular motion. You don’t need to push the swab deep into the nasal cavity; the bacteria typically reside in the moist lining near the front. Repeat this exact process in the second nostril using the same swab tip. This ensures that any bacteria present in either nostril are captured on the single sample head.
The Throat and Tonsils
Open your mouth wide and use a mirror to locate the tonsillar area at the back of your throat. Firmly rub the swab across the back of the throat and over both tonsils. It’s essential to avoid touching your tongue, cheeks, or teeth during this process. Contact with these areas can dilute the sample with excess saliva or introduce unrelated oral bacteria. For additional guidance on MRSA testing and home care, you can explore academic resources that explain how these samples are used to manage infection risks in a clinical setting.
Axilla (Armpits) and Groin
The armpits and groin are warm, moist environments where MRSA thrives. For the armpits, rub the swab across the central hairy area of both pits, ensuring you cover the skin surface thoroughly. When moving to the groin, rub the swab along the skin fold where the leg meets the torso. This area, often called the inguinal fold, is a common reservoir for resistant bacteria. Ensure your skin is completely dry and free of deodorants, powders, or antiseptic lotions before you begin. These substances can inhibit bacterial growth in the lab, potentially leading to an inaccurate result. By following these precise steps, you provide the best possible sample for analysis.
Avoiding Common Errors and Managing Your Samples Post-Collection
Success in screening when learning how to take mrsa swab at home depends on what you do before and after the actual swabbing. One of the most important rules is to avoid using any antiseptic washes, soaps, or antibiotic creams for at least 48 hours before you begin. These substances are designed to kill or suppress bacteria. If they are present on the skin during collection, they can interfere with the lab’s ability to detect MRSA, potentially leading to a false negative result.
Learning how to take mrsa swab at home also requires careful management of the sample until it reaches the lab. Careful management of the sample is just as important as the collection technique itself. When you are finalising the process, you must pay close attention to the administrative details. Ensure the laboratory request form is filled out completely, including the exact date and time you took the sample. This timestamp allows the lab to confirm that the sample is still within its viable window for testing. Label the transport tubes clearly with your full name and date of birth to avoid the risk of lab rejection.
Common Collection Mistakes to Avoid
Even with the best intentions, small errors can compromise your results. We frequently see three common issues that can lead to a request for a retest:
- Insufficient Pressure: Not applying enough pressure to the skin is a common mistake. You aren’t just looking for surface moisture; you need to firmly rotate the swab to collect skin cells where the bacteria reside.
- Accidental Contamination: Allowing the swab tip to touch a non-target surface, such as a countertop or your own fingers, introduces foreign bacteria that can complicate the analysis.
- Incomplete Labelling: A sample that cannot be definitively linked to a patient through clear labelling must be discarded by the lab for safety reasons.
Posting Your Sample in the UK
The logistics of returning your kit are just as important as the collection itself. Each kit includes a prepaid Royal Mail Tracked 24 envelope designed for medical samples. To ensure the fastest transit time, we recommend locating your nearest Priority Postbox. These postboxes have late collection times and are prioritised by the postal service. The ‘Same Day’ rule is essential: always collect and post your sample on the same day. This ensures the bacteria remain viable in the transport medium. Avoid posting on Saturdays or Sundays, as the delay in the postal system over the weekend can affect the accuracy of the results. To ensure your surgery stays on track, you can secure your MRSA screening kit that includes everything you need for a secure return.
Fast-Tracking Your Results with Private MRSA Screening
Private testing is often the preferred choice for patients preparing for surgery because it removes the uncertainty of clinical waiting lists. When you’re managing a complex pre-operative timeline, having control over the timing of your results provides significant peace of mind. Our service ensures that your confidential results are delivered directly to your email. This allows you to forward them to your surgical team immediately, ensuring there are no last-minute delays to your procedure or hospital admission.
We use UK-based, accredited laboratories to process every sample, ensuring clinical-grade accuracy that meets strict hospital standards. When you follow our guidance on how to take mrsa swab at home, you can be confident that the sample you provide is of the highest quality for analysis. By combining professional laboratory expertise with the convenience of a non-clinical environment, we provide a streamlined path to securing your health clearance.
Understanding Your Results Report
Your report will indicate whether MRSA was ‘Detected’ (Positive) or ‘Not Detected’ (Negative). If your result is negative, it means no MRSA was found at the sampled sites. If the result is positive, it signifies colonisation. It’s vital to understand that a positive result isn’t a diagnosis of illness; it simply means the bacteria are present on your skin. If you receive a positive result, your next step is to inform your surgical team. They’ll typically provide a five-day decolonisation routine involving antiseptic washes and nasal creams to clear the bacteria before your operation. Results from mrsatest.co.uk are accepted by most private UK hospitals, making this a reliable route for your pre-assessment requirements.
Ordering Your Kit Today
Acquiring professional-grade screening is simple and discreet. We provide comprehensive at-home test kits in the UK designed for ease of use and rapid processing. If you have an urgent deadline, our PCR kits offer a 24-hour turnaround from the moment the lab receives your sample. This speed is essential for meeting hospital deadlines that require testing to be completed within a specific window before your surgery date.
Once you understand how to take mrsa swab at home, you can complete the entire collection process in just a few minutes. We handle the rest, from providing prepaid return shipping to the secure delivery of your results. Don’t let administrative delays or clinical backlogs stand in the way of your healthcare journey. Order your confidential MRSA test kit online today and take the first step toward a safe and successful surgery.
Securing Your Surgical Timeline with Confidence
Mastering how to take mrsa swab at home is a simple yet vital step in protecting your health before a major procedure. By focusing on the correct “Roll and Rub” technique and maintaining a sterile environment, you ensure that your samples provide the clinical accuracy required by hospital teams. Remember to avoid antiseptic products 48 hours before collection and always post your kit on the same day to keep the sample viable for the laboratory. Accuracy matters.
Choosing a private screening route provides the speed and discretion you need to meet tight pre-operative deadlines. Our kits are processed by an accredited UK laboratory, with PCR results typically available within 24 hours of receipt. We deliver everything in discreet, plain packaging to respect your privacy throughout the process. This streamlined approach minimizes stress and keeps your focus on your recovery.
Order your professional MRSA screening kit for home collection today to gain the peace of mind that comes with expert-backed diagnostics. You’re now fully prepared to manage your screening with confidence and move forward with your surgery. We are here to support you at every stage of the process.
Frequently Asked Questions
Can I take an MRSA swab if I am currently on antibiotics?
You can still take the test, but you must inform your surgical team or the laboratory. Antibiotics can suppress the growth of bacteria on your skin, which might lead to a false negative result. In many cases, it is preferable to wait until you have completed your course of medication. Always follow the specific timing instructions provided in your hospital pre-assessment letter to ensure your results are valid.
How long does an MRSA swab result take to come back?
The turnaround time depends on the specific laboratory method you choose. PCR results are typically available within 24 hours of the lab receiving your sample. Standard culture tests take longer, usually requiring 48 to 72 hours, because the bacteria must be grown in a controlled environment. When planning how to take mrsa swab at home, remember to factor in Royal Mail transit times to meet your surgery deadline.
What happens if I accidentally touch the swab tip?
If you touch the sterile tip with your fingers or it contacts a non-target surface, the sample is contaminated. Skin oils and environmental bacteria can interfere with the laboratory analysis, potentially making your results inconclusive. It is best to use a replacement swab if one is available. If you don’t have a spare, you may need to order a new kit to ensure the clinical integrity of your screening.
Do I need to swab my throat for an MRSA test?
You only need to swab your throat if your hospital specifically requests it. While the nose, armpits, and groin are the most common reservoirs for MRSA, some surgical protocols require a throat sample for a more comprehensive screen. When learning how to take mrsa swab at home, always check the requirements of your specific healthcare provider to ensure you are sampling all the necessary body sites.
Is the at-home MRSA test as accurate as a hospital test?
Yes, at-home kits are clinically equivalent to hospital tests when the collection technique is followed correctly. The samples are processed in the same accredited UK laboratories used by private healthcare providers. The accuracy of the result depends heavily on your technique. Using the “Roll and Rub” method with firm pressure ensures you collect a high-yield sample of skin cells for the laboratory to analyze effectively.
How much does a private MRSA test cost in the UK?
The cost of a private test varies based on whether you choose a standard culture or a rapid PCR method. PCR testing is generally more expensive because it uses advanced DNA detection technology to provide results within 24 hours. Prices also depend on how many body sites are being screened. You should review the different kit options available online to find the one that matches your hospital’s specific requirements and your budget.
Can I eat or drink before taking a throat swab?
You should avoid eating, drinking, or using mouthwash for at least 30 minutes before collecting a throat sample. Food particles or chemical residues from mouthwash can contaminate the swab or dilute the bacterial presence. This waiting period ensures that the sample collected from your tonsils and the back of your throat is pure. This simple step helps the laboratory provide the most accurate assessment of your colonisation status.
What should I do if my MRSA test is positive before surgery?
If your result is positive, you must contact your surgical team immediately. A positive result means you are colonised, not necessarily ill, but it does require action. Your hospital will typically prescribe a five-day decolonisation routine. This usually involves using an antiseptic body wash and a specific nasal ointment. Completing this treatment before your admission date usually allows your surgery to go ahead as planned without any increased risk of infection.