How to Ensure an Accurate MRSA Swab: A Step-by-Step Guide for Home Testing
A single “voided” test result can be the only thing standing between you and your scheduled surgery date. We understand the concern that one small mistake while swabbing might lead to a lab rejection or a delayed procedure. With 75 MRSA cases reported by the UKHSA in March 2026, hospitals are strictly enforcing their 4 to 6 week screening windows. Learning how to ensure accurate mrsa swab collection is the most effective way to protect your surgical timeline and gain peace of mind.
You can achieve the same level of precision as a medical professional from the comfort of your own home. This guide will walk you through the essential pre-test preparation and the precise “no-go” zones to avoid during collection. You’ll learn how to handle your kit to meet the standards of a UKAS-accredited laboratory, ensuring your results are as reliable as those taken in a clinical setting. We’ll provide a clear overview of the three-stage process: clinical preparation, precise site rotation, and immediate preservation, so you can test with total confidence.
Key Takeaways
- Understand the 48-hour rule, which requires avoiding antiseptic washes and antibiotic ointments to prevent false negative results.
- Master the five-second rotation technique to learn how to ensure accurate mrsa swab collection from the nose and other critical body sites.
- Identify and avoid common troubleshooting errors, such as the “dry swab” mistake, to ensure your sample remains viable for laboratory analysis.
- Gain the confidence that your at-home results meet the same UKAS-accredited standards used by hospital labs for pre-surgery screening.
Why Accurate MRSA Swabbing is Critical for Surgery and Safety
Preparing for an upcoming surgery involves more than just fasting or arranging transport. One of the most vital steps is your pre-operative screening. If your surgeon has requested a test, they need to know if you are carrying Methicillin-resistant Staphylococcus aureus (MRSA) on your skin. MRSA colonisation is the presence of bacteria on the skin surface without causing immediate illness. While you might feel perfectly healthy, these bacteria pose a significant risk if they enter a surgical wound. With 75 MRSA bacteraemia cases reported in the UK in March 2026, healthcare providers remain vigilant about screening to prevent these infections from developing into serious complications.
Accuracy in your sample collection is the only way to ensure your surgery date remains on the calendar. A false negative result, where the bacteria are present but not detected due to poor swabbing technique, can lead to life-threatening post-surgical infections. Conversely, a void sample can cause administrative delays that push your procedure back by weeks. Learning how to ensure accurate mrsa swab results is a simple but essential part of your patient journey.
Colonisation vs. Active Infection
There is a distinct difference between being “colonised” and having an active infection. Most people carrying MRSA don’t have any symptoms like redness, swelling, or pus. Instead, the bacteria live quietly in “reservoirs” on the body, such as the nostrils, throat, or groin. We swab these healthy skin areas because they’re the most likely places for the bacteria to hide. Screening allows medical teams to identify these carriers and provide a simple decolonisation treatment, such as antiseptic washes and nasal ointments, before the operation begins. This proactive approach is a primary tool in reducing hospital-acquired infections. For a deeper look at the risks involved, you can read What Is MRSA? Your Complete Guide to Symptoms, Causes & Risks.
The Impact of an Invalid Sample
UKAS-accredited laboratories use highly sensitive equipment to detect bacterial DNA or growth. However, they can only work with what you provide. A sample is often labelled “void” or “insufficient” if there isn’t enough biological material on the swab tip. This usually happens if the swab wasn’t rotated firmly enough against the skin or if it dried out before reaching the lab. The logistical stress of a void result shouldn’t be underestimated. Re-testing requires ordering a new kit and waiting for fresh results, often while your surgical window is closing. Following the provided instruction leaflet exactly is non-negotiable for a valid, laboratory-confirmed result. Understanding how to ensure accurate mrsa swab collection the first time saves you from unnecessary anxiety and keeps your healthcare plan on track.
Preparation: What to Avoid Before Taking Your MRSA Swab
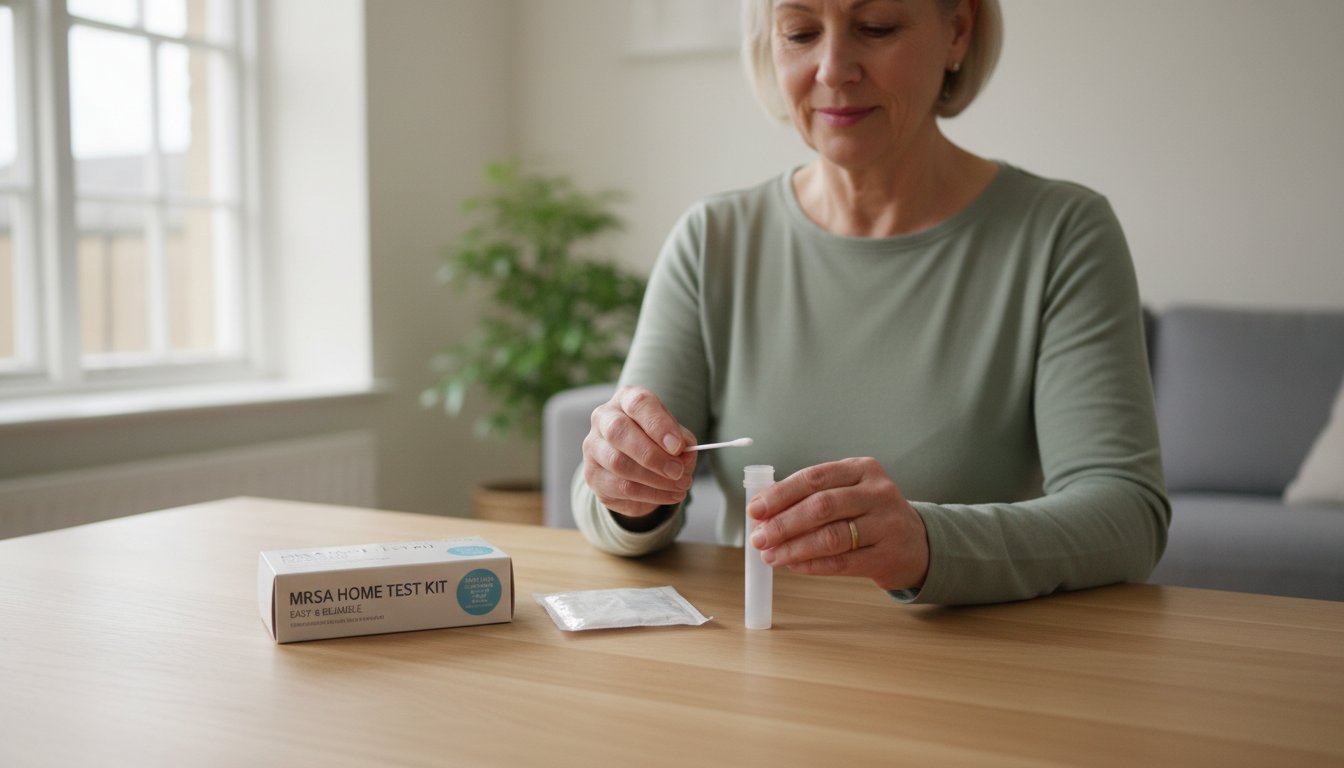
Success starts before you even open the packaging. To understand how to ensure accurate mrsa swab results, you must first create a controlled environment. Choose a clean, draught-free room, such as a bathroom or bedroom, where you won’t be interrupted. Before you begin, inspect your test kit thoroughly. Check the expiry date and ensure the sterile seals are intact. A kit that expired on May 1, 2026, for example, may have compromised transport media. If the seal is broken, the swab is no longer sterile and cannot provide a valid result.
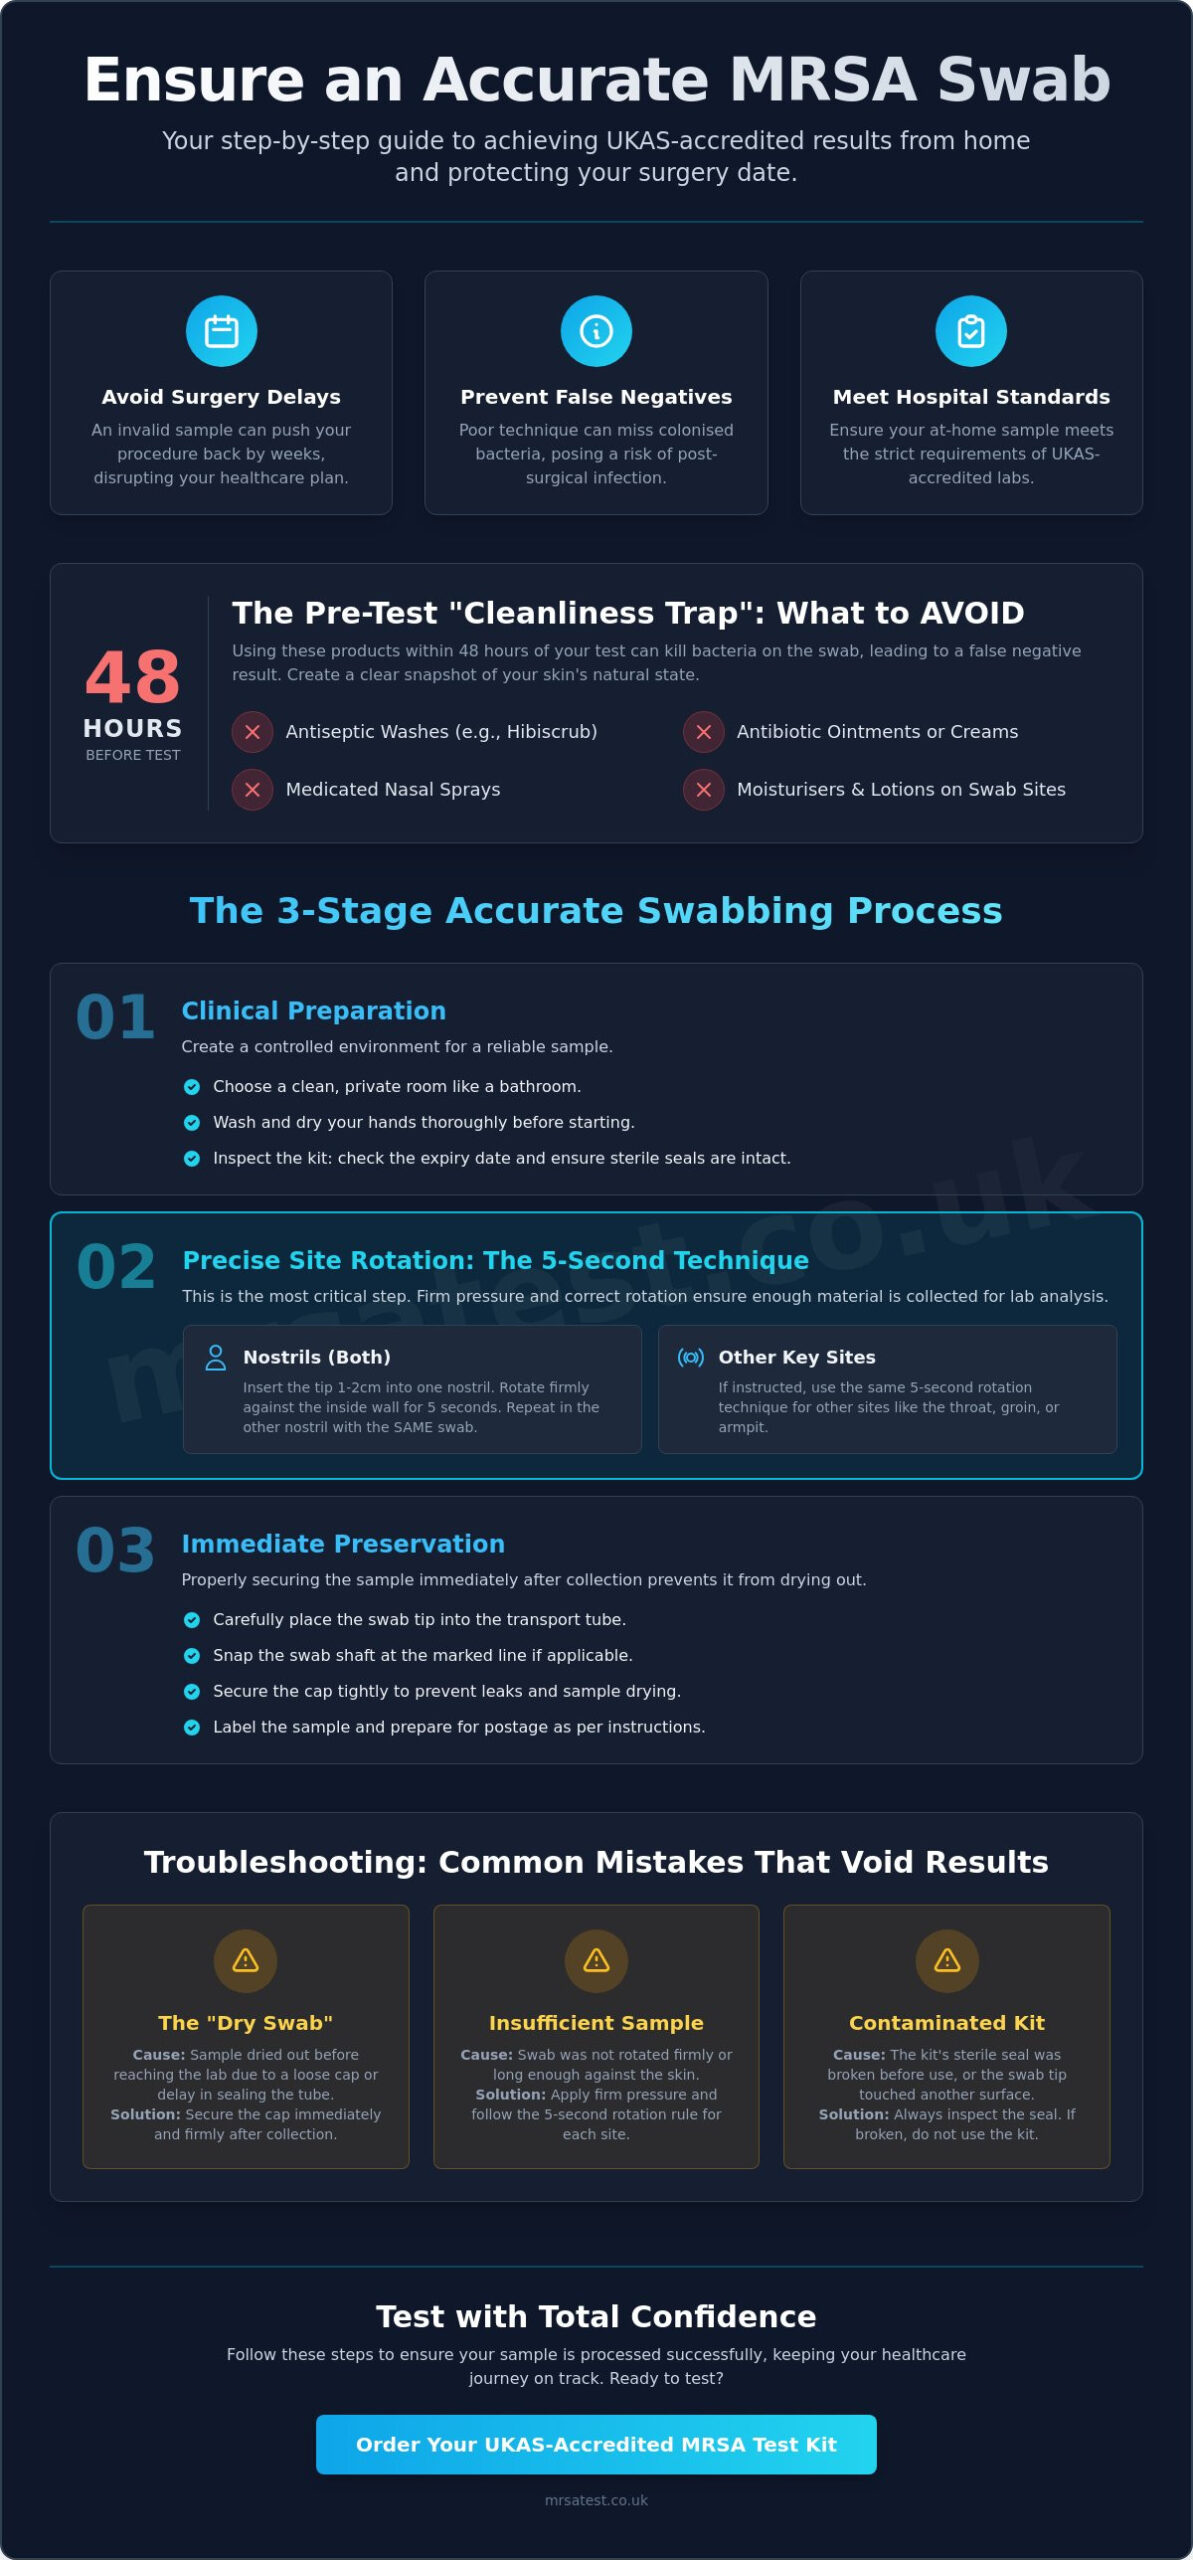
The most common reason for a false negative is the “cleanliness trap.” You might feel the urge to wash thoroughly right before swabbing, but this is a mistake. Antiseptic products are designed to be effective. If you use an antiseptic wash like Hibiscrub within 48 hours of your test, the residual chemicals can kill the bacteria on the swab tip. This prevents the lab from detecting colonisation, even if it’s present. Always follow the 48-hour rule: stop using all antiseptic soaps, antibiotic ointments, or medicated nasal sprays two full days before you take your sample.
Managing Topical Treatments
Topical treatments can easily interfere with a swab’s ability to pick up bacterial samples. Moisturisers, body lotions, and steroid creams create a physical barrier on the skin. This prevents the cotton tip from making direct contact with the bacteria. If you have an active eczema flare or a recent skin break, do not apply any creams to that specific area for 48 hours prior to testing. While CDC guidelines on MRSA emphasise skin integrity, your goal during a swab is to capture a clear snapshot of the bacteria currently living on your skin surface.
Hand Hygiene and Sterile Technique
Maintaining a sterile technique is non-negotiable. The cotton tip of the swab must only touch the designated body sites. If the tip touches your counter, your clothing, or even your “clean” fingers, the sample is contaminated. Start by washing your hands for 20 seconds with plain, non-antibacterial soap. Dry them with a fresh towel or a paper towel. Clear a small area to serve as your “clean zone” and lay out your kit components. If you follow these steps, you can feel confident that you are using a professional MRSA home test correctly. Taking these precautions ensures the lab receives a pure sample, which is the foundation of a reliable result.
Step-by-Step Guide to Taking an Accurate MRSA Sample
Precision is key. The “Five-Second Rotation” rule is the gold standard for clinical sample collection. To understand how to ensure accurate mrsa swab results, you must apply enough friction to pick up skin cells and bacteria. Rotate the swab firmly against the skin for five seconds at each designated site. This duration is critical; a quick dab will not collect enough biological material for the laboratory to process. If the sample is too sparse, the lab may return an “insufficient” result, which could delay your surgical procedure.
The Nasal Swab Technique
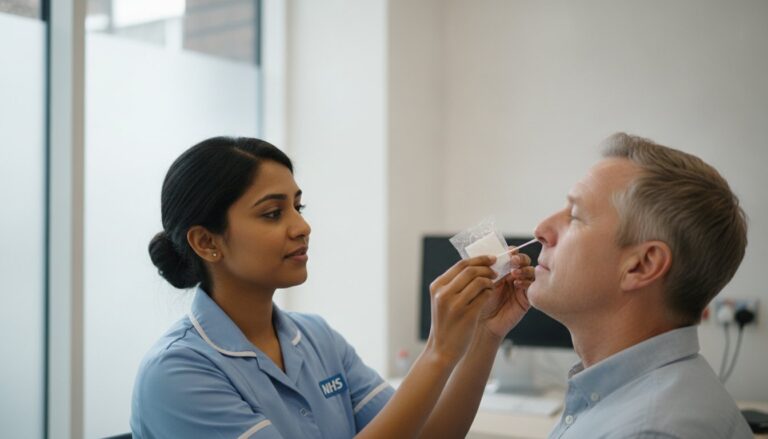
Most UK protocols use the “both nostrils, one swab” method for pre-surgery screening. Start by identifying the anterior nares, which is the fleshy inside tip of your nostril. You don’t need to push the swab deep into your sinuses. If your kit includes a vial of sterile saline, moisten the swab tip slightly before you begin. This helps the cotton fibres trap the bacteria. Insert the tip about 2cm into one nostril and rotate it firmly against the inside wall for five seconds. Repeat this exact process in the second nostril using the same swab. This technique ensures that any colonisation in the primary nasal reservoir is captured. For more detailed visual guidance on this process, you can refer to the NHS guide on how to take your own MRSA swabs.
Groin and Axilla: Finding the Right Spot
MRSA thrives in moisture-rich environments. This makes the groin and axilla (armpit) primary reservoirs for the bacteria. When sampling the groin, focus on the skin fold where the leg meets the torso. For the axilla, ensure the swab makes direct contact with the apex, which is the deepest part of the armpit. Apply firm pressure during the five-second rotation. It shouldn’t be painful, but the swab tip must be compressed against the skin to be effective.
Your kit might be a “dual-swab” kit or a “single-swab” all-site kit. If you’re using an all-site kit, always follow the sequence: nose first, then axilla, then groin. This specific order prevents the transfer of bacteria from the groin to your face. Once you’ve finished, place the swab immediately into the transport tube. Ensure the tip is fully submerged in the transport medium, the gel or liquid at the bottom of the tube. This medium is vital because it keeps the bacteria alive during transit to the lab. Snap the swab handle at the break-point and screw the cap on tightly. If the tip dries out, the bacteria will die, and the test will be void. Mastering how to ensure accurate mrsa swab collection ensures you get a valid result the first time.
Troubleshooting: Common Mistakes That Lead to Inconclusive Results
Even with a perfect swabbing technique, logistical errors can still compromise your results. To understand how to ensure accurate mrsa swab outcomes, you must look beyond the collection process and consider the preservation of the sample. One of the most frequent mistakes is the “Dry Swab” error. This occurs when the swab tip is not fully submerged into the transport medium after collection. The transport medium (the gel in the tube) is designed to keep bacteria alive during transit, not to grow them. Without this protective environment, the bacteria will dehydrate and die before reaching the laboratory, resulting in an inconclusive or “void” report.
Contamination is another significant risk factor. While you are focused on your own hygiene, keep the testing area clear of family members and pets. A single touch from a curious child or contact with pet dander can introduce foreign bacteria that mask the presence of MRSA. Similarly, labeling mishaps are a leading cause of lab rejection. Laboratories operate under strict clinical protocols; an unlabelled tube or a discrepancy in your date of birth is an automatic “no-go” for processing. Ensuring every field on the form is filled out clearly is just as important as the swab itself.
Storage and Posting Logistics
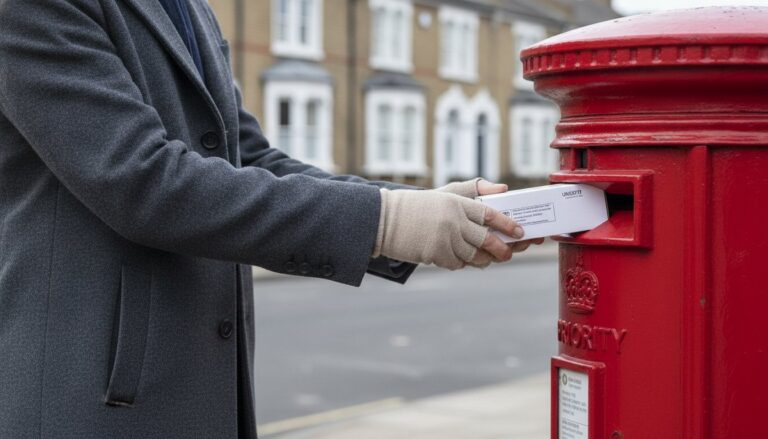
The “Freshness Window” for a biological sample is relatively short. You should aim to post your sample on the same day it is collected to maintain the highest level of accuracy. If there is a delay between collection and posting, keep the kit in a cool, dark place. Avoid placing the package on radiators or in direct sunlight, as high temperatures can degrade the sample. For those managing complex timelines, our Preparing for Surgery: A Complete Pre-Op Health & Logistics Checklist offers more tips on coordinating your tests with your hospital dates.
Labeling and Documentation
Before sealing your return envelope, double-check the spelling of your name and your date of birth on both the tube and the request form. Ensure the swabbing site, such as “Nose/Groin”, is clearly marked to match your specific kit type. The “Time of Collection” is a vital piece of data for the lab; it allows technicians to calculate the sample’s age and ensure it is still within the valid window for testing. Understanding how to ensure accurate mrsa swab protocols helps you avoid the frustration of a rejected kit. If you are ready to secure a clinical-grade result for your upcoming procedure, you can order your MRSA home test kit today and follow these steps for total peace of mind.
Professional Results at Home: The UK Accredited MRSA Test Kit
When you choose a professional home testing kit, you are opting for the same level of clinical scrutiny found in a hospital setting. Knowing how to ensure accurate mrsa swab collection is vital, but the final result depends on the laboratory’s precision. Our partner laboratories are UKAS-accredited, which is the same standard used by the NHS. This ensures that your sample is processed using rigorous, high-quality protocols that surgeons and pre-operative assessment teams trust. By following the techniques outlined in this guide, you can be confident that your home-collected sample provides a valid, laboratory-confirmed result.
One of the primary benefits of our service is the combination of clinical-grade accuracy with total discretion. You don’t need to book a GP appointment or wait in a crowded clinic. Instead, you can complete the process in the comfort of your own home and receive results within 24 to 72 hours of the lab receiving your kit. This speed is essential for meeting the strict 4 to 6 week validity window required by most UK hospitals before surgery. Our MRSA Test options are designed to fit your specific timeline and requirements.
Choosing Between PCR and Culture
We offer two distinct testing methods to suit different needs. The MRSA PCR rapid test option is best for those with urgent deadlines. It uses molecular detection to identify bacterial DNA, providing a result within 24 hours of the lab receiving your sample. If you have more time, the MRSA Culture test is a cost-effective alternative. This traditional method involves growing the bacteria in a controlled environment, which typically takes 48 to 72 hours. Both methods are 100% reliable as long as you follow the correct swabbing technique to provide a sufficient sample.
What Happens After You Post Your Kit?
Once you place your sample in the post using the provided discreet packaging, it travels directly to our trusted UK partner laboratory. Upon arrival, technicians immediately begin the analysis process. You won’t have to chase for updates; your results are delivered confidentially via a secure portal or email. If your result is positive, it simply means you are colonised with the bacteria. You can then take this report to your healthcare provider to begin a decolonisation treatment, which usually involves a five-day course of antiseptic washes and nasal ointments. Understanding how to ensure accurate mrsa swab results gives you the clarity needed to proceed with your medical journey safely and without delay.
Secure Your Surgical Timeline with Confidence
By mastering the five-second rotation rule and strictly following the 48-hour preparation window, you eliminate the risks of false negatives or void samples. Accuracy is the foundation of a safe surgical outcome. Understanding how to ensure accurate mrsa swab collection allows you to take control of your pre-operative requirements without the stress of unnecessary delays. Our service utilizes UKAS-accredited laboratory testing, ensuring your results meet the same clinical standards as any hospital facility. We provide a rapid 24-hour PCR result option for those with urgent surgical dates, all delivered in 100% confidential and discreet packaging to protect your privacy.
Testing for MRSA from the comfort of your own home has never been more straightforward or reliable. You now have the clinical knowledge to collect a high-quality sample that the lab can process with precision. Take the final step in your pre-surgery preparation today. Order Your Professional MRSA Home Test Kit Now and proceed with your healthcare plan knowing you are in capable hands. You have the tools to ensure your procedure stays on track.
Frequently Asked Questions
Can I use water to dampen the swab if it feels too dry?
No, you must never use tap water or bottled water to dampen the swab. These sources contain minerals and microorganisms that can interfere with the laboratory analysis. If your kit includes a vial of sterile saline, use only that specific liquid. If no saline is provided, use the swab dry as instructed. This is a critical step in learning how to ensure accurate mrsa swab results without introducing external contaminants.
Is it normal for the swab to change colour after I use it?
Yes, it’s perfectly normal for the cotton tip to show slight discolouration after use. When you rotate the swab against the skin or inside the nose, it naturally picks up skin oils, proteins, and nasal secretions. This change in appearance doesn’t mean the sample is contaminated or invalid. It simply indicates that you’ve successfully collected biological material for the laboratory to examine under clinical conditions.
What should I do if I accidentally touch the tip of the swab with my fingers?
If you touch the sterile tip of the swab, you must discard it and use a new one. Your fingers carry human DNA and various types of bacteria that will contaminate the sample. This contamination makes it impossible for the lab to provide a clear result for your specific screening. Maintaining a sterile technique is the only way to guarantee your test remains valid for your upcoming hospital admission.
How many days before my surgery should I take the MRSA swab?
You should typically take your MRSA swab 4 to 6 weeks before your scheduled surgery date. Most UK hospitals consider results valid for this specific window, though some may accept them for up to 3 months. It’s essential to confirm the exact requirements with your surgical team. Taking the test within the correct timeframe ensures your results are current when you arrive for your procedure on the day.
Does it matter if I swab my nose or my groin first?
Yes, the order of swabbing is very important for hygiene and accuracy. You should always swab your nose first, followed by the axilla, and finally the groin area. This “top-to-bottom” sequence prevents the transfer of bacteria from the groin to your face. Following this specific order is a key part of how to ensure accurate mrsa swab collection while maintaining a clean and professional testing process from start to finish.
Can I take the MRSA swab while I am on a course of antibiotics?
Antibiotics can interfere with the test by temporarily reducing the amount of bacteria on your skin, which may lead to a false negative result. If possible, wait at least 48 hours after completing your antibiotic course before taking the swab. If your surgery is urgent, you must inform your surgical team that you’re taking antibiotics so they can interpret your results correctly and adjust your care plan accordingly.
What happens if I forget to put the swab into the tube with the gel?
If the swab isn’t placed in the transport gel immediately, the bacteria will dehydrate and die. The laboratory will be unable to grow or detect the MRSA bacteria from a dry sample, leading to a “void” or “inconclusive” result. The transport medium is vital because it preserves the sample during transit. Forgetting this step will almost certainly result in a lab rejection and the need for a re-test.
Is the home MRSA test as accurate as the one done in a hospital?
Yes, an at-home test is just as accurate as a hospital test when the collection instructions are followed precisely. The samples are processed in UKAS-accredited laboratories, which are the same facilities used by the NHS. These labs use high-precision PCR and culture methods to detect colonisation. The clinical accuracy of the result depends on your swabbing technique rather than the location where the sample is taken.