MRSA Swab Collection Instructions: A Step-by-Step Guide for Accurate At-Home Testing
Could a minor error during your pre-admission screening be the hidden cause behind a postponed surgery date? It’s completely normal to feel a sense of pressure when your health check depends on following mrsa swab collection instructions perfectly. Many people feel confused when faced with multiple swabs and various body sites, fearing that a single mistake might lead to an invalid result. You’re likely looking for a way to ensure your samples are handled with the same care a clinical professional would provide.
By reading this guide, you’ll master the exact methods required to ensure laboratory-grade accuracy from the comfort of your home. We’ll provide a clear, step-by-step walkthrough of the entire process, ensuring you collect a successful sample on your first try. This guide is designed to give you total peace of mind, providing the fast and reliable results from a UKAS-accredited lab that your medical team requires for a safe procedure.
Key Takeaways
- Learn how to identify and sample the primary reservoirs of MRSA colonisation, including the nose and skin folds, to ensure a comprehensive screening.
- Follow our clear mrsa swab collection instructions to achieve clinical-grade accuracy from the comfort and privacy of your own home.
- Avoid the “silent failure” of sample rejection by mastering the essential techniques for labelling, dating, and securely sealing your collection tubes for the laboratory.
- Discover why sampling both nostrils with the same swab is a critical step for maintaining the integrity and reliability of your pre-operative health check.
- Understand the clinical importance of precise self-collection in preventing post-operative infections and ensuring your upcoming surgery proceeds without delay.
Preparing for Your MRSA Swab Collection: Kit Components and Hygiene
MRSA screening is a standard part of UK clinical practice, particularly for patients preparing for elective surgery or those recently discharged from hospital. By following these mrsa swab collection instructions, you ensure that your sample remains viable for laboratory analysis. Methicillin-resistant Staphylococcus aureus (MRSA) often lives on the skin or in the nose without causing symptoms, a state known as colonisation. Detecting this early allows for effective decolonisation treatments, which significantly reduces the risk of post-surgical infections.
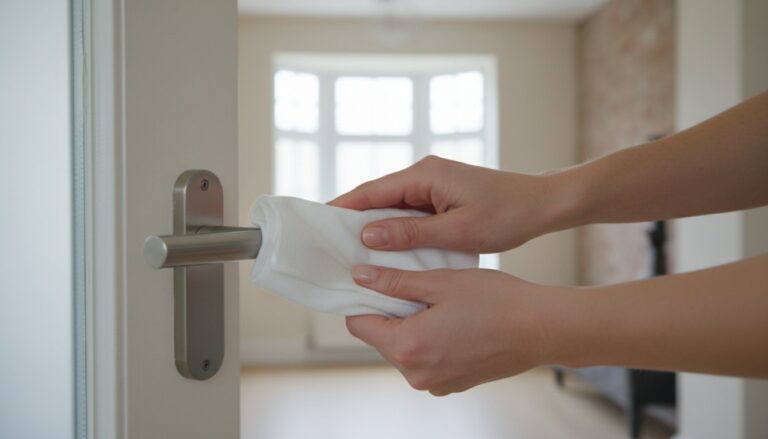
Timing is a critical factor in the accuracy of your results. You should collect your sample as close to the time of posting as possible to ensure the bacteria remain stable. Most UK laboratories recommend that samples reach them within 24 to 48 hours of collection. Creating a dedicated “clinical station” at home helps prevent cross-contamination. Choose a clean, hard surface like a kitchen table or a desk. Clear the area of any personal items, food, or clutter before you begin the process.
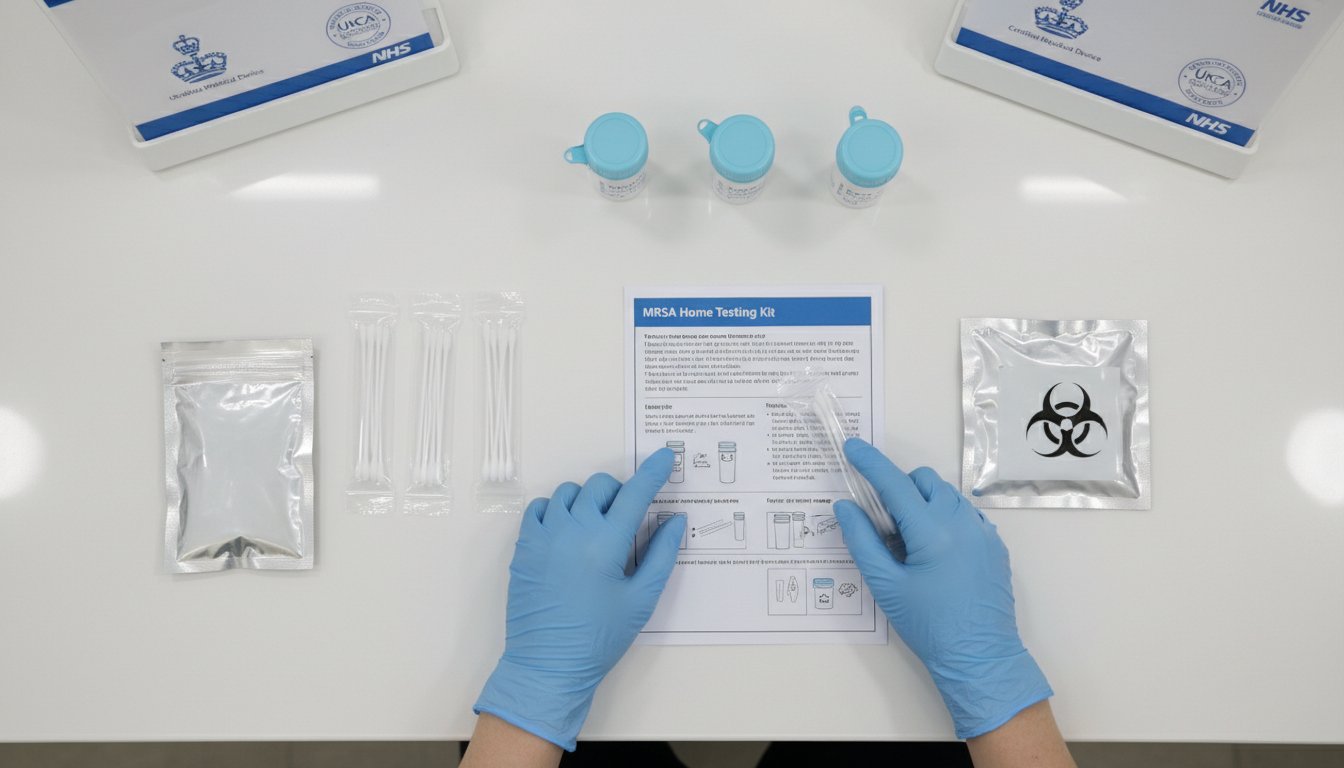
What is inside your UKAS-accredited MRSA kit?
Your testing kit contains professional-grade materials designed to meet strict UKAS standards. Inside, you will find sterile swabs sealed in individual plastic wrappers. It is vital that these remain in their packaging until the exact moment of use; even a brief touch against an uncleaned surface can compromise the test.
The kit also includes a transport medium tube. This tube contains a specific gel or liquid designed to keep the bacteria alive during its journey to the lab without allowing it to overgrow. Depending on your selection, you may have materials for an MRSA Culture Test or a PCR rapid test. Culture tests involve growing the bacteria over several days, while PCR tests look for the specific DNA of the MRSA bacteria. Both require the same careful handling to ensure a high-quality sample.
Pre-collection hygiene and safety protocol
Before you start your mrsa swab collection instructions
Step-by-Step Instructions for Nasal MRSA Swab Collection
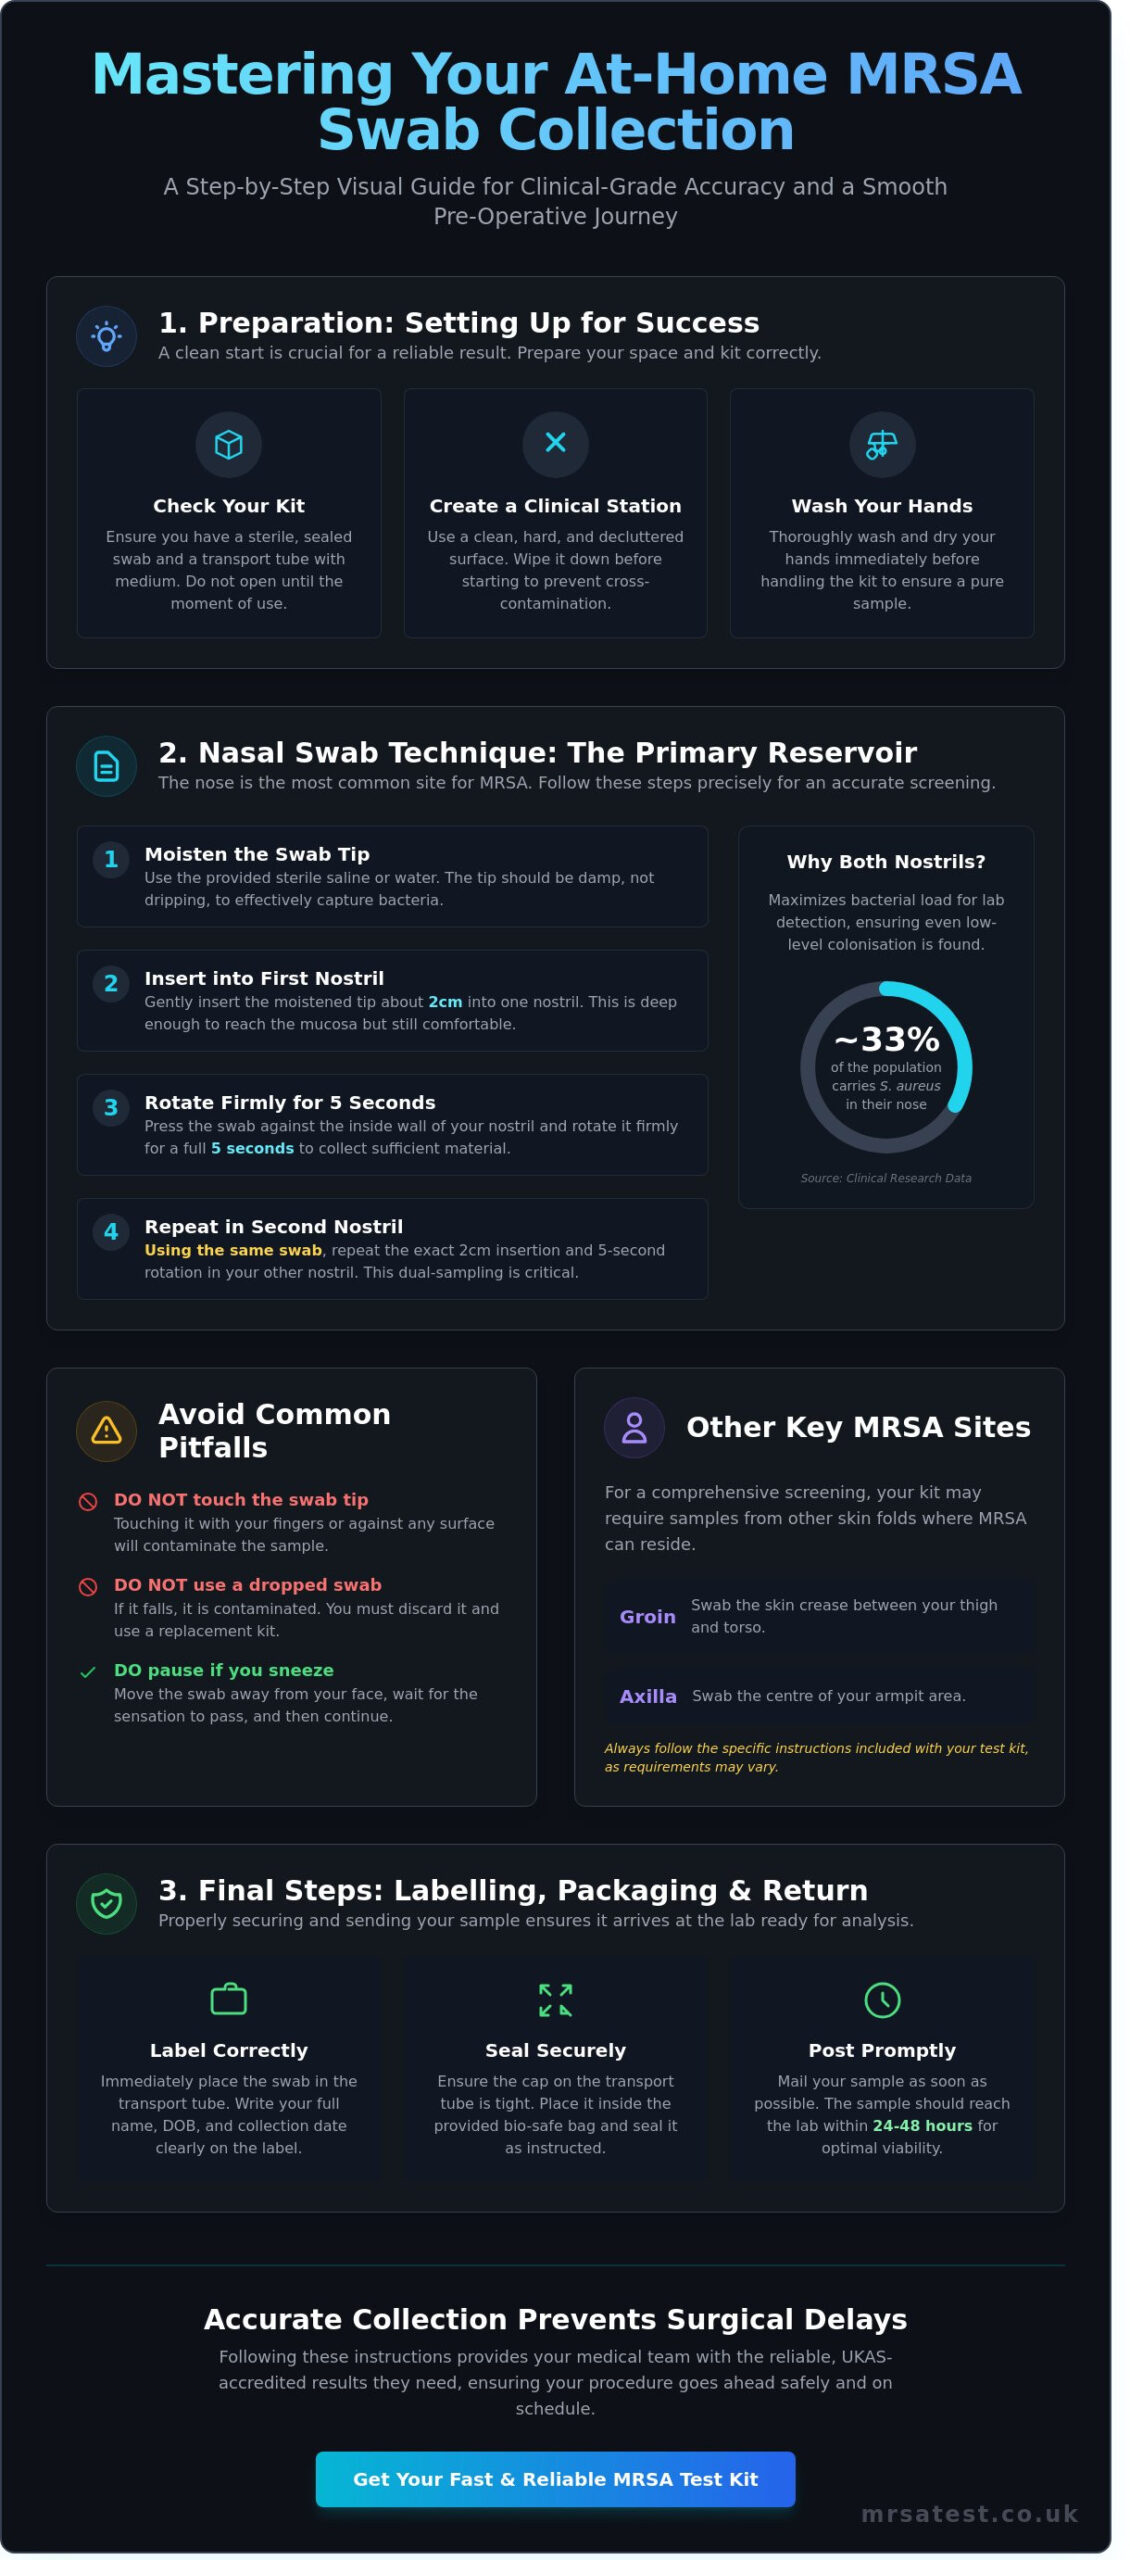
The nose acts as the primary reservoir for MRSA colonisation. Clinical research indicates that approximately 33% of the population carries Staphylococcus aureus in their nostrils at any given time. Following precise mrsa swab collection instructions is the only way to determine if you are part of this group. You must sample both nostrils using a single swab to maximise the bacterial load sent to the laboratory. This dual-sampling technique ensures that even low levels of colonisation are detected by the lab equipment.
Always apply the “Moistening Rule” before you begin. Dry swabs are significantly less effective at capturing bacteria from the dry environment of the anterior nares. Use the sterile saline or water included in your kit to dampen the tip before insertion. This step is vital because it helps the bacterial colonies adhere to the synthetic fibres of the swab. Ensure the tip is moist but not dripping wet, as excess liquid can dilute the sample.
Executing the nasal swab technique
Insert the moistened swab approximately 2cm into the first nostril. This specific depth is deep enough to reach the mucosal area where MRSA thrives, yet shallow enough to ensure safety and comfort. Once inserted, rotate the swab firmly against the internal nasal wall for 5 seconds. This duration is the clinical standard for ensuring enough bio-burden is collected for an accurate PCR rapid test or culture. Repeat this exact process in the second nostril using the same swab. You must avoid touching the external skin or your fingers during this process to prevent “contaminant” bacteria from entering the sample tube.
Common nasal swabbing mistakes and how to avoid them
Sneezing is a common reflex during the collection process. If this happens, move the swab away from your face and wait for the sensation to pass before you continue. If you drop the swab on any surface, including a “clean” bathroom counter, you must discard it and use a replacement kit. Contamination from household surfaces can lead to inaccurate results that do not reflect your true colonisation status. Consistent contact with the nasal lining is the goal for a high bacterial yield; vigorous scrubbing isn’t necessary and may cause minor irritation.
How to Collect MRSA Swabs from the Groin and Axilla
MRSA often colonises in warm, moist areas where skin meets skin. These folds, particularly the groin and armpits, are critical sites for screening. Bacteria like Staphylococcus aureus thrive in these environments, so capturing a high-quality sample here is vital for an accurate result. Following these mrsa swab collection instructions carefully helps our UKAS-accredited laboratory detect even low levels of colonisation.
Self-collection at home allows you to maintain your privacy and dignity. You don’t have to worry about the discomfort of a clinical setting when sampling sensitive areas. It’s a simple process that puts you in control of your healthcare journey while ensuring the same level of accuracy as a hospital-led test. By taking the sample yourself, you can ensure the environment is calm and the process is handled with the care it deserves.
The groin and perineum collection method
To sample the groin, identify the crease where your leg meets your torso. This is the primary area where bacteria congregate. You must follow the ‘Front-to-Back’ rule: always wipe the swab from the front of the groin towards the back area, known as the perineum. This technique maintains clinical purity by preventing the transfer of unrelated bacteria into the sample site. Apply firm pressure while rubbing the swab back and forth for approximately 5 seconds. The pressure should be firm enough to collect skin cells but never painful. If your kit contains multiple swabs, check the labels carefully to ensure you’re using the correct one for this specific site.
Swabbing the Axilla (Armpit) and other skin sites
Before you begin swabbing your armpits, ensure the skin is clean and free from any deodorants, antiperspirants, or body powders. These products contain chemicals that can inhibit the growth of bacteria in a culture or interfere with a PCR rapid test. To get the best sample, use a ‘Z-pattern’ technique. Move the swab in a zigzag motion across the entire hollow of the armpit to cover the broadest surface area possible. This increases the likelihood of picking up any MRSA present on the skin.
Special care is needed if you have indwelling devices or existing wounds. If you have a catheter or a surgical drain, use the swab to sample the skin within 2 centimetres of the insertion site. For specific skin lesions or wounds, your surgeon might request a dedicated sample. In these cases, use a fresh swab to gently but firmly rotate over the affected area. This targeted approach provides the most comprehensive view of your colonisation status before any planned medical procedures.
Labelling, Packaging, and Returning Your MRSA Samples
Following the mrsa swab collection instructions precisely is vital, but the process doesn’t end once the swab is in the tube. Many users overlook the final administrative steps, leading to what clinicians call a ‘silent failure’ at the laboratory. Even a perfectly collected sample is useless if the lab can’t verify when or who it came from. UKAS-accredited facilities maintain strict quality standards. They’ll reject any specimen that lacks clear identification or a recorded collection time to ensure clinical accuracy. This protocol protects your health by preventing the risk of a false negative result from a degraded or unidentifiable sample.
When you place the swab into the transport medium, press the cap down firmly. You must hear or feel a distinct ‘click’ to ensure it’s airtight. This seal prevents leakage and contamination during transit. While our transport tubes are designed to stabilise the sample, extreme heat can still degrade the bacteria. Keep your kit at room temperature and avoid leaving it in direct sunlight or a hot car before posting. You’ve done the hard work of collecting the sample; these final checks ensure that effort isn’t wasted and your results remain reliable.
Completing your documentation and labels
Matching your sample to your request form is the only way the lab can link your results to your profile. Apply the provided label horizontally along the length of the tube, ensuring the barcode remains flat and readable for the laboratory scanners. A sample without a collection date cannot be processed by a UKAS-accredited laboratory. Double-check that the name on the tube matches your registration details exactly. If the lab finds a discrepancy, they’re legally required to discard the sample to maintain data integrity and patient safety.
Royal Mail return logistics and tracking
Timing is everything for a viable MRSA culture. You should aim to post your sample on the same day you collect it to ensure it arrives within the necessary 24-hour window. Use the prepaid Royal Mail Tracked 24 envelope included in your kit for the fastest delivery. For the most reliable service, locate your nearest Priority Postbox. These boxes are specifically designated for medical kits and often have later collection times, which is essential for weekend dispatches. You can monitor your kit’s journey to our UK partner lab by entering your tracking number into the mrsatest.co.uk portal.
Ready to ensure your health is protected with professional-grade accuracy? Order your discreet MRSA test kit today for fast, reliable results from our trusted UK partner laboratory.
Why Accurate Collection Matters for Your Surgery and Health
Following the mrsa swab collection instructions precisely is about more than just completing a checklist. It is a vital step in ensuring your safety during and after a surgical procedure. MRSA colonisation occurs when the bacteria live on your skin or inside your nose without causing an active infection. While this is harmless in daily life, it becomes a significant risk the moment a surgical incision is made. If these bacteria enter the bloodstream or a deep tissue wound, they can cause severe post-operative site infections that are difficult to treat with standard antibiotics.
A “False Negative” result is the primary risk of poor swabbing. This happens when the bacteria are present on your body, but because the swab didn’t make enough contact with the skin or the correct sites were missed, the lab cannot detect them. Relying on an inaccurate negative result means you enter the operating theatre without the necessary precautions. This puts your health at risk and can lead to prolonged hospital stays or secondary surgeries to treat an avoidable infection.
The impact of a positive result found too late is often the cancellation of your procedure. For many patients in the UK, a cancelled surgery causes significant emotional distress and logistical headaches. It also carries a financial burden for private patients or a waste of resources for the NHS. By ensuring you provide a high-quality sample the first time, you help your surgical team maintain a sterile environment and keep your recovery on track.
Preventing hospital delays with professional-grade testing
Our service is designed to integrate seamlessly with your healthcare journey. If you are on a tight schedule, our MRSA rapid PCR test provides results within 24 hours of the sample reaching our laboratory. This molecular detection method is highly sensitive and offers the speed required for last-minute pre-operative clearances. All samples are processed in a 100% UK-based accredited facility, giving you the same level of accuracy you would expect from a hospital lab. You can easily share these results with your NHS or private hospital pre-op team to confirm you are clear for surgery.
Next steps after you receive your results
Once your results are ready, you will receive a clear report. If your result is “Negative,” it means MRSA was not detected, and you can proceed with your surgery as planned. If you test “Positive,” don’t panic. It simply means you are colonised. Your doctor will likely prescribe a “decolonisation” kit, which usually involves a five-day course of special antimicrobial body washes and nasal ointments to clear the bacteria from your skin. After this treatment, you will typically be re-tested to ensure the colonisation has cleared.
Take control of your pre-operative preparation today. Order your standard MRSA culture screen for total peace of mind and ensure your surgery goes ahead without delay.
Secure Your Health with Accurate MRSA Screening
Following these mrsa swab collection instructions ensures your samples are viable and your results are reliable. By carefully swabbing the nose, groin, and axilla, you provide our clinical team with the best possible data for your pre-surgery screening. It’s a simple process. Accurate self-sampling is the foundation of a successful screening programme. When you follow the steps for hygiene and labelling, you eliminate the risk of contamination that could delay your medical treatment. We handle the rest once your kit arrives at our UKAS-accredited UK laboratory. You don’t have to worry about long wait times. We provide results in as little as 24 hours. Every kit includes discreet and free Royal Mail shipping, so your privacy is maintained from start to finish. Taking this proactive step today gives you the peace of mind you need before any clinical procedure. Our service is designed to fit into your schedule, allowing you to test for MRSA from the comfort of your own home without the need for a GP appointment.
Order Your Professional MRSA Home Test Kit Now
You’re in capable hands, and we’re here to make your screening process as straightforward as possible.
Frequently Asked Questions
Do I need to swab my throat for an MRSA test?
You don’t always need to swab your throat, but it depends on your specific hospital’s protocol. Standard UK pre-operative screening typically requires samples from the nostrils and groin. If your clinician has specifically requested a throat sample, ensure you follow the provided MRSA swab collection instructions to avoid contaminating the sample with saliva. Accuracy is vital for your safety.
Can I take the MRSA swab while I am on antibiotics?
You shouldn’t perform the test while taking antibiotics as they can mask the presence of bacteria and lead to an inaccurate result. Clinical guidelines suggest waiting at least 48 hours after your last dose before collecting your sample. If you’re currently on a course of treatment, consult your GP to determine the best timing for your screening. This ensures the laboratory can detect any colonisation correctly.
What happens if I forget to moisten the swab before use?
If you forget to moisten the swab, the tip may not collect enough skin cells or bacteria for an accurate laboratory analysis. Using a dry swab can reduce the sample yield by up to 30% compared to a pre-moistened one. If this happens, it’s best to use a new kit to ensure your results are reliable and valid for clinical use. Moisture is the key to a successful test.
How long are MRSA swab results valid for before surgery?
Most UK hospitals consider MRSA screening results valid for a period of 3 to 4 weeks before your scheduled procedure. If your surgery is delayed beyond 30 days, you’ll likely need to repeat the test to ensure no new colonisation has occurred. Always confirm the specific timeframe with your surgical team to avoid last-minute cancellations. Timely testing protects both you and the hospital environment.
Is it possible to do the MRSA swab if I have a cold or runny nose?
You can still perform the test if you have a cold, but you must ensure the sample isn’t contaminated with excess mucus. Gently blow your nose before starting the mrsa swab collection instructions to clear the nasal passages. This helps the swab make direct contact with the skin inside the nostril where the bacteria typically reside. Clear passages lead to more reliable results for the lab team.
Can I eat or drink before performing the MRSA swab collection?
You’re free to eat and drink as normal before collecting your samples as it won’t affect the bacteria on your skin or in your nose. Since the test focuses on external colonisation rather than internal health markers, there’s no need to fast. Just ensure you wash your hands thoroughly before handling the kit to prevent external contamination. It’s a simple process designed for your convenience.
What should I do if the liquid in the transport tube leaks?
You shouldn’t use the kit if the transport medium liquid has leaked from the tube. This liquid is essential for keeping any collected bacteria alive during transit to our UKAS-accredited laboratory. If the tube is dry or the seal is broken, contact our support team immediately for a replacement kit. We want to ensure your test remains valid and provides the fast results you need.
Does the MRSA swab hurt or cause bleeding?
The collection process is entirely painless and shouldn’t cause any bleeding or discomfort. You only need to apply gentle pressure while rotating the soft cotton tip against the skin or inside the nostril for about 5 seconds. It’s a non-invasive procedure designed to be completed quickly and safely from the comfort of your own home. Your peace of mind is our priority throughout the process.